Pressure Kegging Dry-Hopped, Nice Clean Beers
I use a Brewhemoth, and a few months ago I started to experiment with various ways to transfer my finished beer to kegs, with the minimum possible oxidation. Depending on the beer, I had a few problems to solve.
- For a beer without dry hops, how to fill kegs with no oxygen exposure
- For a beer with dry hops, how to dry hop right in the conical and avoid a secondary
- And for the grand fanale, how to fill kegs with no oxygen exposure, direct from the conical, after dry hopping in the conical, without getting hops in the kegs
I played with various things, and had lots of false starts and failed attempts. Plugged fittings, crazy foaming, having to "fall back" to open transfers ... I had some frustrating sessions. So, I decided to tackle one problem at a time, and evolve the fittings batch over batch until I got to my ultimate goal. What you'll see here is the finished, "does it all" solution, with only the parts that work right.
WARNING!!! The process described in this write up requires pressurization of a conical fermenter. Make sure your conical can handle the pressures required before following these steps! If your conical can not safely accommodate these pressures, serious injury may result! Perform these steps at your own risk! I am not liable in any way for damage to your equipment, yourself, or others.
Photos & Overview
Here's a shot of the conical with the filter apparatus attached. You can see the beginning of the "out" tubing at the top right, after the filter.
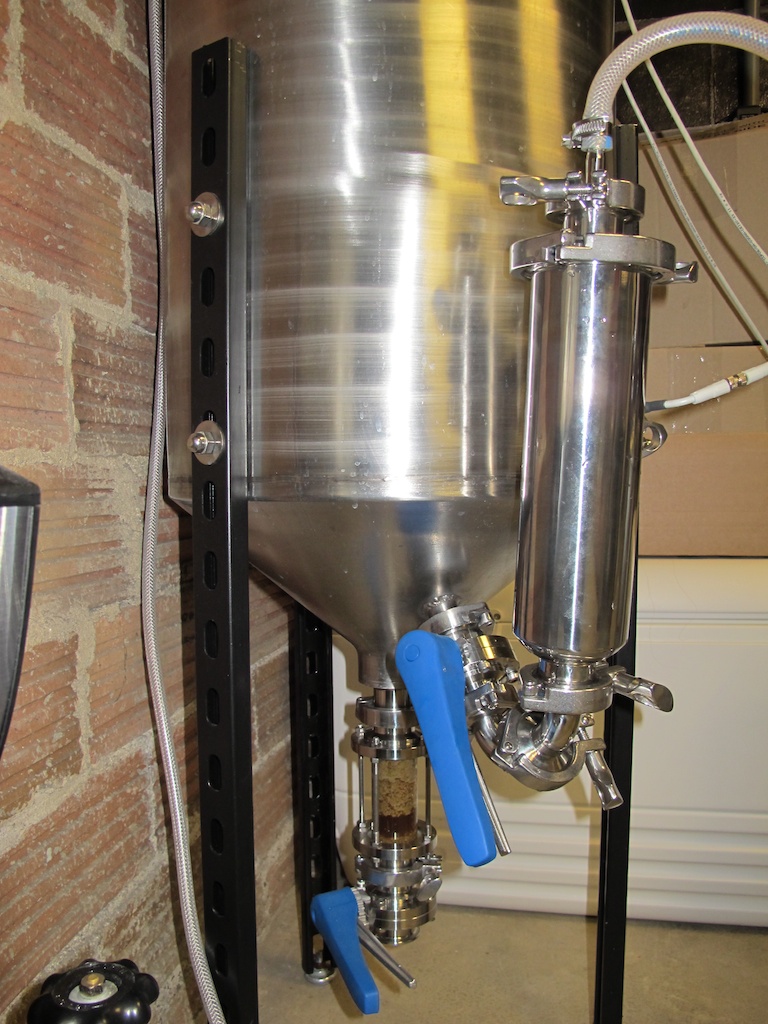
Below the conical is a sight glass and dump valve. Many people have a similar setup. It is important for my filtration scheme that you have a dump valve of some kind, so you can drop trub and settled yeast as your fermentation trails off. You need to have the bulk of the junk removed before you start your transfer, so that you are pulling beer rather than junk through your racking port.
On the racking port, there are the following items hooked up, in order;
- 1-1/2" tri-clover butterfly valve (Brewer's Hardware TC15VBFVST)
- 1" tri-clover 90º elbow (BH: TC10ELL90)
- 1" tri-clover 45º elbow (BH: TC10ELL45)
- Brewers Hardware tri-clover strainer/filter, with 0.2mm stainless filter net (BH: TC15STRAINER & FILTERNET200)
- 1-1/2" x 1/2" tri-clover to barb fitting (BH: TC15B12)
You could avoid the elbow fittings possibly, although I am not sure the handle on the valve would clear the filter housing. I suspect it would not. My reason for using elbows to orient the filter "up" is simple; when you open the butterfly valve very little (if any, see order below) air will bubble up into the conical, and the filter can be purged of air before filling begins.
Here is an overall shot of all the parts of the process.
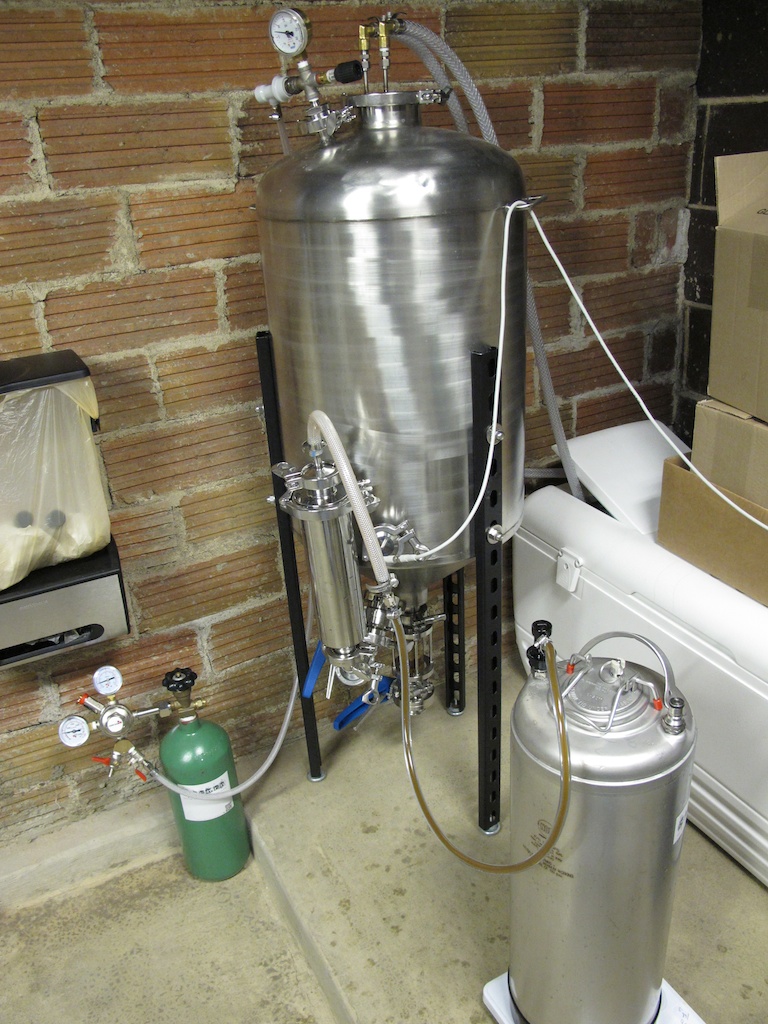
The CO2 tank maintains pressure in the conical during the process. I have found 3-5psi to be the sweet spot for transferring with minimal foaming.
Parts here are;
- CO2 Tank with air (grey) ball lock adapter
- Spunding valve (link)
The spunding valve provides a handy hookup point for the CO2, although you could roll your own simpler fitting for this and save a few bucks if you don't spund.
Here is a more detailed shot of the remaining fittings between the filter and the keg.

From the filter onwards, the parts are;
- 1' section of 3/8" ID braid reinforced (very important! regular hose goes boom!) silicone hose (Midwest H8117)
- 3/8" barb to 1/4" MFL adapter (Midwest S6018)
- Jumper hose consisting of regular bev tubing and swivel flare fittings (Midwest 5185 for the fittings)
- Liquid side (black) ball-lock adapter (Midwest 5130)
And last in line, we have the keg itself;
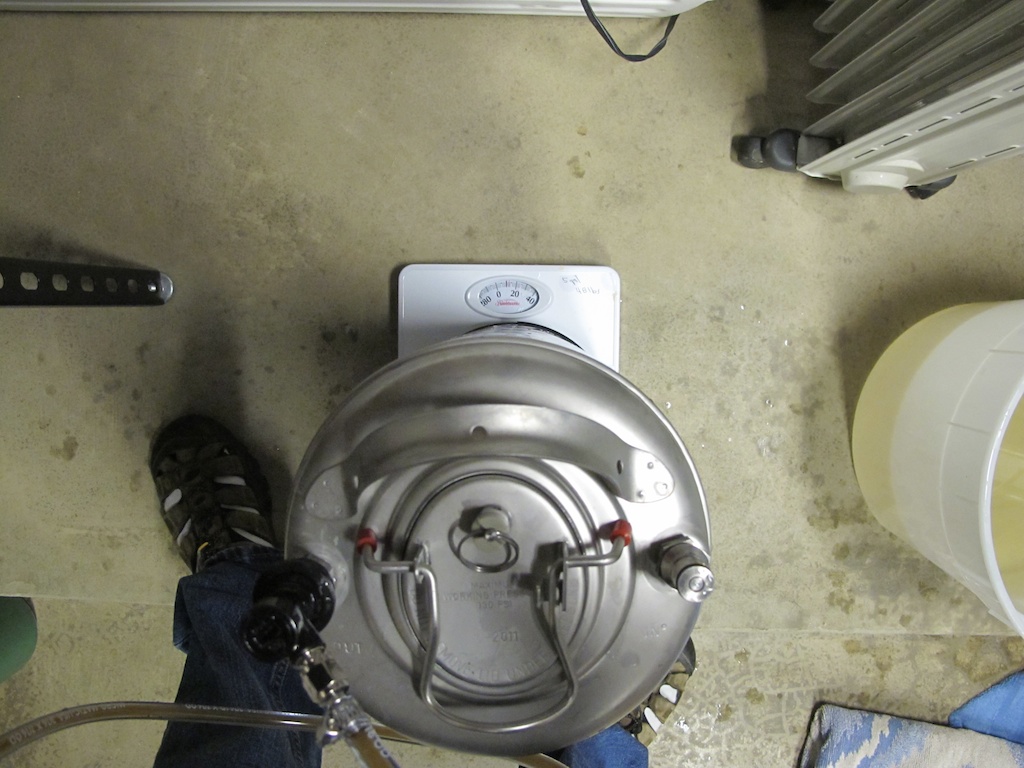
The keg sits on a cheapo wal-mart floor scale, which is how I tell how full the keg is during filling. I simply measured the weight of the keg full of water to use as a reference, which in my case is 48lbs. Your number will vary, so be sure to test this yourself with your own kegs.
The Steps
Now that we have all the parts ironed out, let's talk about the process!
- Brew, Ferment
- Nearing the end of fermentation, drop your first load of settled yeast & trub
- After primary fermentation is complete, optionally drop the rest of the settled yeast (up to you - I prefer to do so)
- If dry hopping, dry hop (pellets only!)
- If you dry hopped, the day before kegging drop some of the hop matter (keeps bottom port from plugging)
- If you dry hopped, the day of kegging drop dry hops until you start to see beer in the drop. This gets rid of all the settled hops. There will still be lots more in solution though.
Now, you're ready to keg!
- Sanitize all fittings, tubing, keg, and filter/strainer
- Assemble all parts wet, while your keg drip-dries
- Sanitize the butterfly valve on the conical and attach all the fittings
- Don't hook up the keg yet
- Hook up the CO2 to the conical, and pressurize to 3-5psi
- Once everything is secure, open the butterfly valve to pressurize the filter assembly
- Over a bucket of some sort, stick your finger into the ball lock fitting to open it, and purge the air out of the line. Let about a cup or two of beer flow out as well, to flush the sanitizer out of everything
- Assemble the keg
- Purge the keg with CO2, and then pressurize it to the same pressure as the conical
- Hook the CO2 back up to the conical, at the same pressure
- Attach the ball lock fitting to the liquid side of the keg
At this point, a little beer will flow into the keg (you'll hear it if you listen closely), but it will quickly equalize pressure and stop flowing. It's now your job to pull the release ring on the keg every minute or so, while watching the weight of the keg on the scale. As it fills, the pressure will equalize faster between release pulls, and you will need to pull the release more often. When the scale indicates your keg is full, pull off the ball lock adapter, and start the next keg!
Conclusion
It all sounds pretty complicated, but it's super easy to do, now that I have the kinks worked out. Here's a few other things I have learned along the way;
- If you don't dry hop, you can skip the filter and hook the tri-clover barb adapter right up to the butterfly valve. Assuming you have dropped enough yeast!
- If you are dry hopping, don't apply a spunding valve after adding the hops. The CO2 in the beer at kegging time will create a LOT of foam in the lines after getting pushed through the filter, and filling will take forever.
- Make sure your butterfly valve handles are aligned correctly for later steps before you fill the conical. Ask me how I know ;)
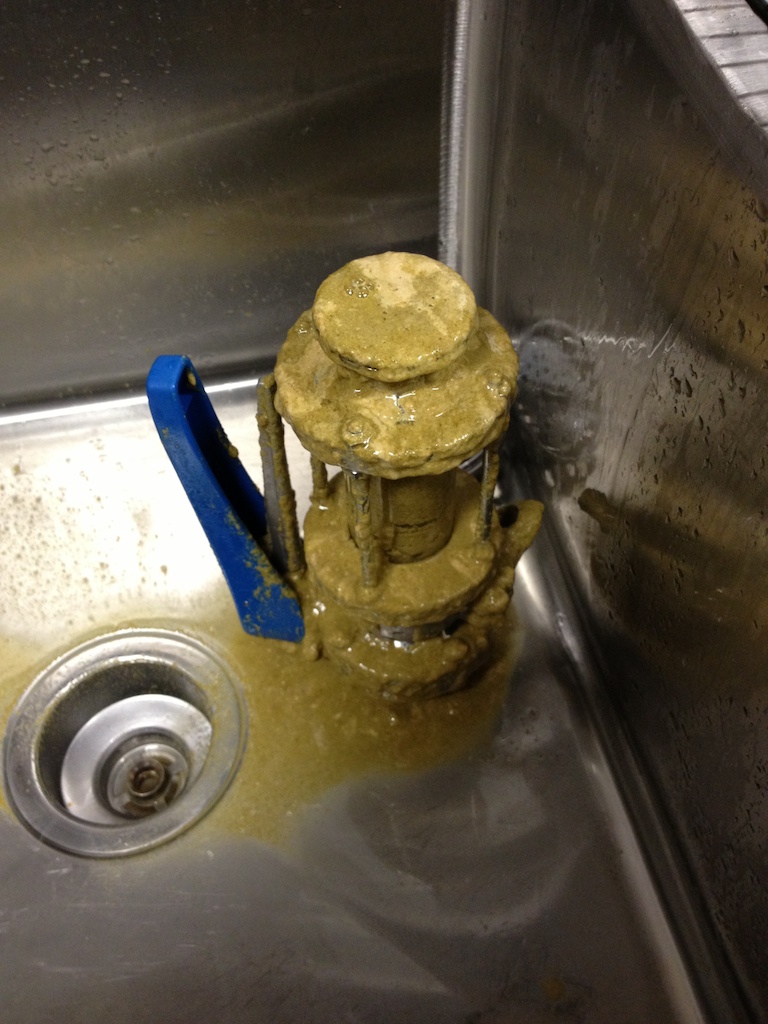
I'll leave you with one more picture, showing the aftermath of the last beer I kegged using this process. It was dry hopped with 8oz of Amarillo, on a 10 gallon batch. This is the sight glass assembly removed after the conical was empty. As you can see, there's lots still to be filtered, even after good drops!